
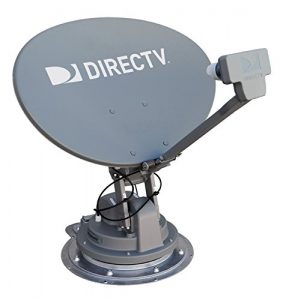
I received a satellite dish for DirecTV from Winegard, specifically the Trav’ler. Its an HD dish that mounts to the roof of your RV and automatically finds the right satellite so all you have to do is turn it on and it searches. There are two cables that attach to it, several screws to mount it down, and attaching the dish to the components. That’s really about all there is to setting the whole thing up. We’ll discuss how to set up DirecTV in a future article as we have not yet received the receiver, but this article is all about installing the actual dish.
In the Box
Inside the box is the base mechanism and arm for the dish, the dish (unattached for shipping), three boxes, a bag of hardware, a 30 foot coax cable, and a packet of instructions. In the boxes are the electronic components and power supplies for power and activating the dish. Be warned, it is heavy and large. The box is roughly 4 feet by about 2.5 and about 20 inches deep. All total, it weighs nearly 65 pounds.
When ours arrived, it was cold and wet outside, so I carried it into the hallway of our RV. It took up most of the space between the tv and couch (we don’t have slide outs), and I was afraid to move it. A few days later when the weather was nicer, I took it apart, put the heavy mount in a basement unit, and waited for warmer weather to install it. That finally happened when we got to Florida and while its not completely setup, I think the hardest part is done.
Getting it to the roof
The most difficult and most physically demanding step in this process is getting the mount up to the roof. The good thing is you only have to do this once. Get help doing this! The mount weighs about 60 pounds, so unless you are very strong and have a separate ladder, you are going to need help. I had originally planned on carrying it up via the ladder on the back, but trying to hold 60 pounds of metal and plastic while climbing up that precarious ladder was just not going to happen. Instead, I used a normal house ladder, took my time, and carefully got it up to the roof. Because it was dark and I had other projects that were more immediate concerns, I left it up there overnight.
Next get all your tools up there. You will need a drill with a very small bit to drill pilot holes for the mounting screws. You’ll also need some sort of sealant for the base and the two holes you’ll be making for the cables. Grab a socket wrench for attaching the dish to the base. Finally, a tape measure. I also recommend having someone there to spot and help you, just in case you run into something that is easier to toss up to the roof than for you to climb down, find it, climb back up, and repeat several times.
Measure, measure, measure!
The dimensions for space around the mount are listed in the instructions. Its a little smaller than 3 feet by 4 feet. It also needs to have no obstructions higher than 10 inches within its circle. Because the mount and attached dish move automatically, it is very important to make sure nothing is within the dimensions listed in the installation instructions.
On the base, there are arrows pointing in opposite directions and it is clearly labeled “front” and “back”. When mounted, the dish arm points towards the rear of the RV, which I assume is for wind resistance issues so that when driving the dish doesn’t catch the incoming air and get forced up. I mounted ours near the rear of the RV and back in a corner. I did this because we will be adding solar panels in the future and wanted to leave as much roof space as possible for that. Because the attached data cable and included coax are about 30 feet, unless you have a very long RV, you can probably place it anywhere you want. Just make sure your cables are long enough to wherever you are putting the electronics inside the RV.
When laying down the mount in place, mark where the holes will be for the mounting screws as well as the outside line of the base. We have an aluminum roof, so I simply scratched it with a drill bit and left a mark. Then I moved the base, put a liberal amount of sealant along the inside of the screw holes and at each each screw point. Sealant is your friend, you don’t want water leaking inside, so use a lot.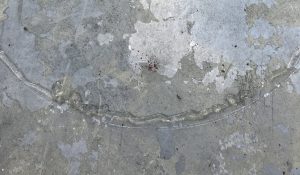
Then I placed the base back in its position. I was able to line it up pretty close to its original location, so it only required a little adjustment to get all the sealant and screw holes lined up. Here’s where I came into the first issue. The screws that are included are not very long. I screwed them in tight, but they only grabbed onto the aluminum roof and I don’t think any of them attached to the metal ribs underneath. Because of this, its on tight, but I don’t feel safe with it. Instead, I’m going to run to a Home Depot and get bolts, nuts, and washers, and use that instead. I’ll drill holes through the mounting holes, run the bolts through the ceiling, put on washers and nuts and it’ll be much more secure.
The second issue, and this is entirely my fault, is that I nicked a DC power line inside the ceiling or behind the breaker box. I thought I was clear of it, but when I came inside to check things, I had blown a fuse and the DC outlets were not working. I had hoped I could avoid accessing the electrical systems, but now I’m going to have to open it up, find the offending screw, and fix the wire. Its not a huge deal, but if you can, mount the dish somewhere that you know what is exactly underneath and inside your RV.
Mounting the dish
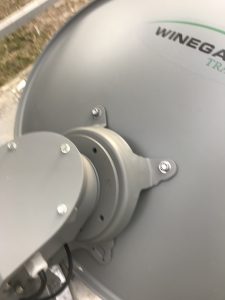
Before you screw down the base, attach the dish to the arm. It is much easier to do while you have some flexibility. The dish slides into the arm with two small tabs near the bottom, then is bolted to the arm with two bolts, washers and nuts a few inches above the tabs. Its pretty easy to do, the bolt heads go in the surface of the dish and the nuts go on the back of the arm.
Securing the Base
With the base now, double check everything is lined up correctly and then screw it down in place. Be sure to get the screws tight enough so it won’t move, but don’t strip the holes in the roof. As I said, I’m going to get some bolts and go through the roof, so while there will be bolt heads or nuts sticking through our ceiling, I’ll feel safer knowing they are bolted on and not going anywhere.
After you have the screws (or bolts) in place and secure, use more sealant on the heads so no water leaks in through those holes either. Sealant is cheap, replacing a roof because of a leak is not. Use it as much as you can.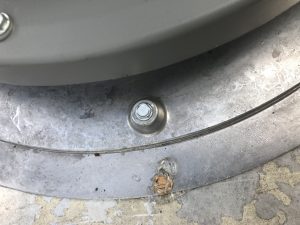
That’s it for the dish and base. Make sure you have it lined up and within its safe space, caulk, screw down. That’s all there is to it.
Running the Cable
There are two cables that attach to the base, one for power and the search box, one for coax to connect to the receivers. I am waiting on the coax cable since I am not sure where the DirecTV receivers will be located and I don’t want it just hanging out on the roof until I’m ready to complete it. It attaches with a standard screw on port, so adding it when we are ready will be easy.
The other cable is hard attached to the base. Its about 30 feet long and connects to the device that turns on the dish and searches for the satellite to connect to. This box then has a power cord for AC power and has to be located inside. I chose to put ours in the electrical cabinet we have inside the RV near the front. The cable had about 8 feet extra, so it was plenty long for our RV.
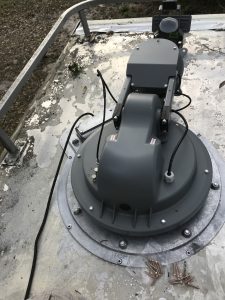
I had considered running it into the ceiling through the roof vent for the refrigerator, but since the whole package came with a cover, I figured I’d use that instead. It was also easier to just drill one hole through the roof and run the wire than it would have been to go down the roof vent, through some cabinets, and into the electronics cabinet. I may do that with the coax when we get ready to install it, but for now, the power source is enough.
I drilled one hole for the wire (which has to be big enough for the 6-port junction at the end), fed it through and it went in easily. I ran the entire length of the cable into the cabinet below, then mounted the cover and screwed it down. Finally, I added sealant, a lot of sealant. I put it around the hole before putting on the cover, then on each screw, then one the edges of the cover and both above and below the cable. The cover is a pretty snug fit, but with the sealant, no water is getting in there.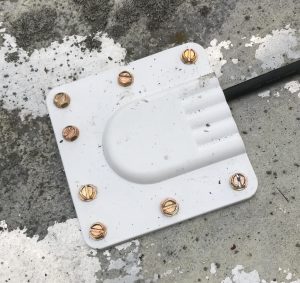
Connecting the Control Module
The Control Module is in one of those small boxes listed at the beginning. There are a few ports on the back, but only two you should care about: The six-port data plug and the power. Plug in the data cable, it has to go in correctly so line up the holes with the plugs, and push it in firmly. Next plug in the power cable, then at the other end of the power brick, plug it into power.
When you first turn on the control module, press and hold it for a few seconds. If you press it and release right away, it will turn on briefly, then shut off. When it turns on, it will start up the motor for the base up on the roof and begin searching for a signal. That’s all there is to it.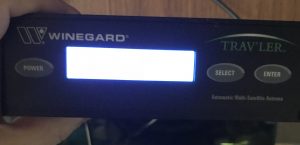
Now when you get to a campground, all you have to do is turn on the control module and it will automatically begin searching for a signal from a satellite. In our case, it never found one. This is not a slight against Winegard though as we are parked under several trees. If we were more out in the open, I have no doubt it would be able to find a signal.
Always remember to shut off the dish and make sure it has folded back down into position before you travel. You do not want to driving around with a dish sticking up as it will cause wind resistance could tear off, as well as increasing your height profile. Make sure you have a checklist and add “satellite dish” to the checklist.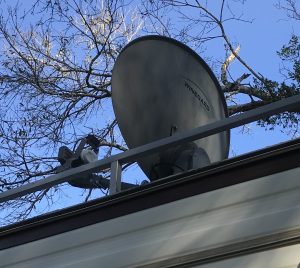
Steps remaining:
- Attach coaxial cable, power control, and splitter.
- Attach HD Receivers.
- Setup DirecTV service.
- Enjoy HD TV!
[…] its really, really light. There is no issue getting this up on the roof like there was with the Trav’ler. I’m not sure the exact weight, but its only a couple of pounds […]