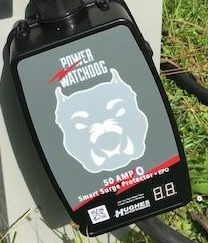
Our Watchdog recently protected our RV from damage, but took damage itself and is apparently dead. I was able to contact Hughes Autoformer, told them what happened, and they sent out a replacement for me. I got it a few days ago and installed it yesterday. It was back up and running in no time since it is plug and play.
While I had the power shut off though, I did change around the way our Autoformer and Watchdog are sitting next to the power pole to make it easier to lock and put on the cover they had previously sent me. The Autoformer came with a lock that slips through the handle on top and can be locked to the power pole, and in our case, our power pole has a small hole that just barely fits the cable, so I can lock it to the pole instead of wrapping it around somehow. With it moved to the front of the pole, the cable now has more slack and the cover for the Autoformer fits better with the cable in use and the Watchdog hooked on. Not a huge issue, but it helps.
We also have our Autoformer sitting up on a concrete block to stay out of the puddles that can form when it rains, which raises it several inches and puts it closer to the hole. While you don’t have to put it up as high as we did, we are pretty much permanently at our site, so we went with something that isn’t moving any time soon.
With the new Watchdog hooked up, I then had to figure out how to connect it to the RV Whisper since it had been several months since I connected the first one and couldn’t remember the steps. Fortunately, it was pretty simple.
RV Whisper New Sensor Connections
To remove the old sensor from the RV Whisper, its as simple as clicking on the middle option at the top of the web page (it looks like a graph of three vertical bars). That brings up Sensor Settings. One of the options there is Remove Sensor. Click that, then click the sensor you want to remove, and its gone.
Next, click on Add Sensor and, here’s the difficult part, follow the instructions that show up for the type of sensor you are adding. That’s it!
It is literally built right in the app for how to add any available sensor. While the Watchdog is a little more complicated than other sensors, it is still not too difficult. I had to add it to the Watchdog App, then get a number from that, then enter that number into RV Whisper.
I’m not sure if it is the same for all sensors, but for the Watchdog at least, it does take a couple minutes to start collecting information, so it will say there is no data available if you check it immediately after adding. A couple of minutes later and it will start showing the graph with data.
I do plan on adding other sensors, and as soon as I do that, I’ll walk you through the steps for adding each of those. I expect each of them to be as simple, or easier, than adding the Watchdog since those sensors are developed by RV Whisper and not a separate company like the Watchdog is.
For our previous post about the RV Whisper:
RV Whisper Review
And the Watchdog:
Hughes Watchdog EPO Review and Installation Guide
How the Watchdog Protected Our RV!
