
This review has been a long time in the works. Our original plan was to go to Florida last Thanksgiving and add solar panels, a much larger battery setup, an inverter, and the other parts required for running our RV completely off the grid and unplugged. If you’ve been following along, you’ll know we didn’t make it to Florida until January after having transmission issues, then having to get a tune up after a fire, and finally getting our exhaust repaired. As part of our original plans, I had reached out to companies for technology included in the setup and we received a Tripp Lite 2000 Watt Inverter/Converter for review. I had planned on to install it around Thanksgiving, then by Christmas, then whenever we could get around to it. I did research, lots of research, on both the unit itself as well as how to include it in the system. I joined groups on Facebook focused solely on solar powered RVs, I joined RV forums focused on vintage RVs. I searched, I read, I accumulated information. And in the end, I came to one simple conclusion: I can’t do this myself.
Note: If you don’t know what you are doing, hire an electrician to install this for you. Do not base any installations on what you read here, I’m not a professional, I’m only telling you what I have to do. In the end, I’m getting a professional to install it for me to avoid me making a mistake and causing damage to our RV.
Here is the setup: We have a 1988 Tiffin Allegro. It is a 33 feet long Class A RV with basements. It has space for two house batteries, and nowhere for an inverter. Its old, so its not setup to add solar power initially (though from what I’ve found, the so-called “solar ready” RVs are able to barely support one solar panel). So we need to do work, a lot of work, and we need to get help from professionals. First though, we need to figure out what our demands are for boondocking, what we need to power off of solar and batteries, and how we need to do that.
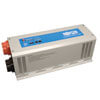
The Tripp Lite unit we received is a 2000 Watt Inverter/Converter. Specifically, the APS2012SW. For full information on the unit, I suggest going to Tripp Lite’s web site and reading the specifications, manual, installation instructions and everything else you can find there.
Broken down, the unit has two main functions: Inverting and Converting. These are two very different things, so do not confuse them. In fact, they are complete opposites of each other, but it is very important to understand the differences.
Inverter
An inverter takes direct current electricity (DC), and inverts it in alternating current electricity (AC). This means that it takes the power from a battery, which is always DC power, and turns it into AC power, which is what most appliances use. In your RV, your fridge, microwave, TVs, and probably all of your electronics, run on AC power. There are some devices, like tablets and smartphones, that have a small USB plug that can plug into a computer or small power adapter. Basically, if it has a two- or three-prong plug like you’d have in a traditional house, then its an AC appliance.
Converter
A converter, on the other hand, takes AC power and converts it to DC power. This is almost always used just for charging the batteries while on shore power in an RV. Your RV likely already has a converter built-in, as there is usually no other way to charge the batteries on their own. Some RVs, especially newer ones, do have the alternator in the engine do double duty and charge the house and engine batteries, and if you have a generator, that will also charge the batteries. In the case of a generator though, the power is still likely going through the same converter as the shore power.
The Inverter/Converter
In the case of an inverter/converter, it does both of these tasks in the same unit. AC power comes in, gets converted to DC to charge the batteries, then DC comes in from the batteries and gets inverted to AC power and goes out to your appliances.
The Current System
As our RV currently sits, the power goes like this: When plugged into shore power, it comes in through the 50amp cord and goes to a transfer switch. The power is then sent to the breaker panel. From there it, it splits so it goes out to outlets and the converter, which then goes to the batteries to charge them. The DC devices we have, which is pretty much just the fridge and lights, then get power from the batteries through the fuse box.
If we are running the generator and not plugged in, the power goes from the generator to the transfer switch and then everything else is the same.
When we are not plugged in and not running the generator, then only the DC devices work. The lights still turn on, the fridge runs on propane (but still needs some DC to power the electronics), and that’s really it. Everything else is AC powered and thus inoperable without being plugged in or the generator running.
How do we change this? That’s where the Inverter/Converter comes in.
The Future System
The benefit of adding an inverter to an RV electrical system is that you can now use appliances that run on AC power without being plugged in. With a big enough battery bank and a way to recharge them, you may never need to plug in, in fact. It can get expensive, but it has the benefit of low upkeep and free power, barring the initial setup costs.
 We are working on adding solar to the RV, but costs are getting in the way. Since we’ve had so many mechanical issues, our money has been going to repairing the engine so we can keep moving instead of to things like boosting the power system. Its coming, but its coming much slower than I anticipated. There are also some things that I thought I had taken care of but are proving to not be working out, such as fixing a leak in the roof, that need to be taken care of first. After we repair the engine and get the roof sealed, we shouldn’t have much else left to fix and can start with the solar system.
So how does this all tie together and how do we make it work?
First, the converter part of the inverter/converter is easy, simply take the cables and connect them from the old converter. The power going into the old converter will instead go into the converter part of the inverter/converter, and the output will go to the batteries. Easy enough, just need to have long enough and high enough gauge cables to handle the load.
In our RV though, there is one small problem: The converter is currently underneath the refrigerator on the passenger’s side of the RV, while the batteries are on the driver’s side. Since the batteries need to be as close as possible to the inverter to avoid power loss, we need the inverter on the driver’s side, which means we need to run the cable from the one side of the RV to the other. We can get terminal junction blocks to connect the new wires to the old and not have to run new wires from the breaker box all the way to the new converter, but we still need to get the cable from one side to the other. We could go up or down, but in this case, down is much easier.
From the old converter spot, we’ll have to make a hole in the floor and run the wire underneath the floor of the RV. There are some wires that already go underneath in that area, so we can probably just use a hole that already exists and feed it through. Our basement units also go all the way under the RV, so we can easily run the wire sideways underneath, and then up to the inverter.
Now, your RV will be different. In our case, we used to have a dinette. I ripped it out because we never used it and I’m going to be building a desk with storage in that spot. Within this desk I’ll be putting batteries and the inverter, as well as the secondary breaker box.
Two things to note!
First, the Tripp Lite only works with Lead Acid batteries. This includes traditional deep cycle, AGM, and Gel, but NOT lithium batteries. If you want to use it as just an inverter, that should work fine, but the converter part of it does not work with lithium ion batteries of any sort.
Second, it is imperative to figure out which devices you need to run off the inverter and have a secondary breaker box for those devices. If you were to somehow plug it into the original breaker box, you’d create a loop where power was going from the shore plugin to the converter to the batteries to the inverter to the breaker box back to the converter. This would be bad. Very, very bad. Instead, you need a breaker box that runs just off the inverter, so those devices will run through the inverter and its not feeding back into itself. In this way, everything running off the inverter breaker box will be limited by the 2000 Watt limit, so its important to understand how much power you need and what you will be running off it all the time.
So what do we need to run off the inverter? We don’t have a lot of devices that we need to run all the time, but we do have a few I’d like connected continuously. That list is this:
- Computer Server
- TVs
- Cell Booster
- Cell Modem
- Chargers for Mobile Devices
- Computer Router
That’s really it. In addition to those items, we’ll also be adding an outlet for plugging other things we may need to plug in occasionally, but not need to run a dedicated outlet for.
For instance, it is our intention when boondocking to not need the microwave often. Hopefully not even once a day. When we do have to use the microwave, we can turn on the generator for a few minutes and just use that. The same is true with a coffee maker, that only gets used once a day, maybe twice. I’ll have to check out the wattage of the coffee maker we have, but it might be possible to move it over to the desk and plug it into the extra outlet and leave it there if we’ll be there for awhile. Other things like the microwave and fans get rarely used, but they don’t draw too much power on their own and can be plugged into the extra outlets we’ll run.
Our oven is propane, and while boondocking, we’ll use the fridge on propane and DC power. If we can power all our electronics through the inverter, then we’ll be set. We also cook out over a fire a lot, so that reduces our need for power even further. I would like to get an induction cooktop eventually, but if we boondock, we’d likely be unable to use that unless running the generator, which would ruin the point of boondocking.
Tying it all together
To make this work, we need batteries. Because the Tripp Lite Inverter/Converter can only be used with lead acid batteries, we’ll have to go with that. Lithium batteries are still pretty expensive, so using AGM for now is fine anyway. For our system, we’ll be getting the VMAX 4-pack of 6v 225amp-Hour batteries. That would give us 225aH of usable battery power since tying two together would result in 12v, and then the two sets together makes 450aH, but with AGM batteries, its recommended to keep them at least 50% full at all times. 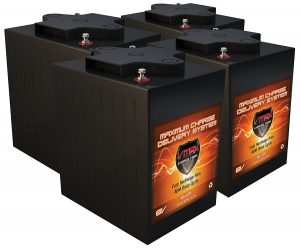 Because these batteries are only about 10 inches wide by seven inches, we can place then in a row within the desk space, then build a shelf above the them for the inverter, and have the distance from batteries to inverter to be less than six inches, which is ideal.
To connect the batteries to the inverter and to each other, we’ll have to use 0AWG stranded wire. Since the RV does move occasionally, stranded is usually better than a solid core because if one strand breaks, the whole cable still works, but with solid core, if it breaks, nothing works at all. I’m not sure how much cable we are going to need, but its going to be a lot. We are also going to need to run a cable from the old converter spot to the new converter spot, which will probably be 8 or ten feet, depending on what is in the way under the RV. It might even be longer than that. We’ll also need some posts to make a junction from old to new.
Beyond that, we need to run power to where it will be for the inverter-powered items. There are three locations for needed power: The media cabinet, the rear TV, and the cell booster/modem. To get to these, we have to be creative.
The media cabinet is located on the passenger side near the front of the RV and up on the ceiling. We are going to be building an entertainment center underneath it on the floor, but we still need to run electrical up to it. There will be several devices powered off this extension, a TV, the DirecTV receiver, several computers and hard drives, an Xbox, and a router. We can run one cable and put a multiple outlet box in the cabinet and have enough outlets for everything.
The rear TV is all by itself on the passenger side of the RV at the rear. It doesn’t have anything else that goes with it since the Roku stick that is attached to it plugs into the USB port on the TV. However, we can add an additional outlet there as well so we can charge things like tablets, laptops, or phones.
The cell booster and modem are located in the rear on the driver’s side. Since the cabinet from the cell booster to the TV is open and goes along both back sides and the rear of the RV, we can run the cable with the TV outlet, but have it on its own break, and just run it the rest of the way to the cell booster and modem. Since we’ll be adding power, we’ll also add another outlet or two in this area since that is usually where we have a fan plugged in when its warmer out.
Now, with this setup, the inverter and batteries are on the driver’s side, while the outlets all need to be run on the passenger side. The easies route would be to go through the basement unit, following the converter cable in reverse, and then go up the closet and go in opposite directions, two towards the back and one towards the front. I’ve already run one cable that route to the back for the rear view camera, so to run two power cables that way isn’t too difficult. Its trail has already been blazed.
To get to the front is a bit more difficult. There are two paths, through cabinets, or through the floor. If we go through the cabinets, we have to figure out how to get behind the fridge, go behind the microwave, through the dishes cupboard, inside the small shelf above the door, and finally into the media cabinet. Not impossible, but not easy either. The biggest obstacle in this case is going to be getting a drill small enough to fit in those areas, especially for the shelf above the door since it is only about three inches deep.
We will also install one or two outlets builtin to the desk. Since the desk is going to be custom made, its fine to add outlets wherever we want. We can put one facing up on the surface for things like charging a computer or adding a desk lamp, and we can put one on the side facing the hallway so we can plug in a vacuum or anything random that might be needed out there.
With that all run though, we can install traditional household outlet boxes, hide them in cabinets, and everything plugged in and working.
Except for one thing…
Back at the inverter, we need a breaker box. Now, we need to be able to distribute the power properly, have breakers installed in case of overload, and really, just be able to protect the wiring and keep it better than a rat’s nest of cables. For that, we can get a simple 8-circuit breaker box.
Its not elegant, but it is required. With this and the inclusion of 20 amp breakers, we can split the power coming off the inverter to the various outlets and power them all off the inverter.
In this setup, when plugged into shore power, the electricity will come in, go to the main breaker box where it will be sent to some outlets. Then, it will also be sent to the converter, which will charge the batteries, and then get sent to the inverter, which will power the dedicated outlets through the second breaker box. There will be some power loss from converting and then inverting, but since we’ll be plugged into shore power in this scenario, that’s an acceptable loss.
When solar panels get purchased and installed, then they will be charging the batteries which will then send electricity to the inverter and to the dedicated outlets.
Just one other thing
There is one more thing that I haven’t addressed here that needs to be mentioned: Some devices can run off DC pwoer directly. Things like phone charges, some fans we have, and even the Raspberry Pi’s we are using in the Smart Home on Wheels project can be powered directly from DC power. For these devices, it will probably be best just run a cable from the batteries directly to their destination, then have a fuse box for the different devices there. In the front dash, we need to add DC power from the house batteries instead of the engine battery, so we’ll run one cable from the batteries to the front and into a fuse box, then branch it out from there. We have several devices that are all DC powered like the rear view camera, the stereo, a GPS, and we’ll be adding a couple of USB outlets so we can charge our phones while driving.
We can add other DC outlets around the RV as we need them at later dates, but for now, we are going to focus on the installation of the inverter/converter and getting it all up and working. We won’t be able to afford the batteries right away, but we have a house battery now we can at least use for the time being since we will be on shore power almost all the time anyway. We have many things to purchase and acquire first though, but the goal is to have the inverter/converter at least installed in about two weeks.
The desk that is housing everything will be built in that time as well, we just have to figure out how to make room for everything that will be encased within. how to make it all easy to access if things need to be worked on, and how to leave room for future growth.
[…] Then there is the desk and power bank. I tore out the dinette awhile ago and will be replacing it with a desk for us to work on instead of having everything on our laps in the bed or on the dash up front. I’m still working on the exact design, but I want it to have room for the inverter, batteries, and a computer server. It doesn’t require a lot of space, but it will require some work to make it all fit. The batteries I want are also around $1000, so well, that’s not going to happen any time soon. We have the inverter, just need to install it, but I want to wait until we know exactly where it is going to be and how everything will connect together before I run the cables to make it work. Read here for the setup with the inverter. […]