I received a Winegard ConnecT 2.0 4G2 (WF2-435) 4G LTE and Wi-Fi Extender for RVs for review. This device is simple to install, easy to setup, and works reliably as much as we’ve used it. For an in depth description of our internet setup, please read Mobile Internet Setup.
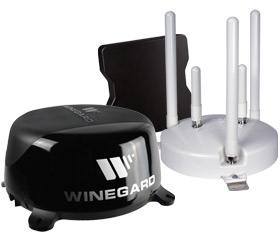 When I picked up the box for the ConnecT 2.0, I was surprised at how light it was. Its a fairly large box, but since most of the dome is empty space and the rest of the antenna is plastic, its really, really light. There is no issue getting this up on the roof like there was with the Trav’ler. I’m not sure the exact weight, but its only a couple of pounds total.
Inside the box, there is the ConnecT itself and a bag of parts and that’s it. The ConnecT is not too big, about 18 inches across total. The bag of parts includes the power switch and face plate, a cover for the power cable going into the roof, the ends to connect to the power switch, and a bunch of screws. For tools and other supplies, you will need a screwdriver, a drill with a bit slightly larger than the power cable, some Dicor Self Leveling Sealant, some way to connect the power to the unit, and I recommend Eternabond for holding the cable in place. To connect to power, I used T-taps as the ConnecT only requires 1 amp of power, which is the same amount that goes to the lights in most RVs.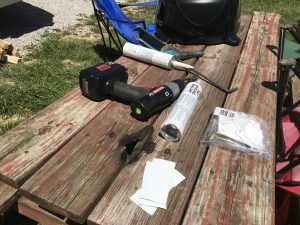
Wifi Information
On the bottom of the Winegard ConnecT 2.0 there is a small decal with some information on it. You need this information. Take a photo with your phone if you have to as then its always in your phone. It has the information for the SSID (the wifi network name), and the password. Without this information, you’ll never be able to connect to the wifi from the ConnecT.
Installation
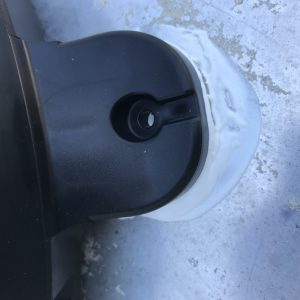
To install the ConnecT, first figure out where you are going to install the power switch inside to make sure the power cable is long enough. Since I put ours in our electronics cabinet and already had a cover for the Trav’ler, I just put it within range of that. I removed the original cover (which is the same part as the cover that came with the ConnecT), drilled a hole and fed the cable down into the cabinet. I pulled through enough cable to have plenty of excess to route it to the where the switch would be located and to power, and kept the rest on top of the roof.
 |
|
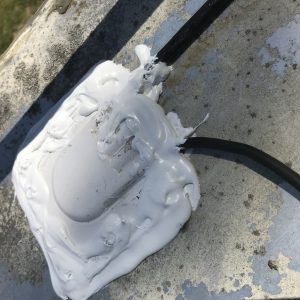 |
I then placed the ConnecT where I wanted it, which is towards the front of our RV and to the side, but far enough away from the edge and the air conditioner. I measured front and back to make sure it was in line with the length of the RV and then used a drill bit to score the roof and mark where it would be placed. I have a photo of the marks, but it doesn’t show them clearly. I then moved the ConnecT aside and placed a lot of Dicor Self Leveling Sealant on and around the score marks. Since I never want anything to leak in those holes where the screws were going, I used a lot. I’ve never had an issue with Dicor leaking, so I keep it on hand at all times just in case something comes up.
With the Dicor in place, I set the ConnecT down onto the puddles of sealant, measured again, and then screwed it in place. I then put even more Dicor down on top of the screw heads and around the edges, just to make sure no water is ever getting in there.
I then routed the power cable where it was going to be run and held it in place with a few strips of Eternabond. I’m not sure if its needed, but I assume for better aerodynamics its best to run straight lines with cables, so I ran it straight back, then a 90° angle to the hole and then pulled the slack through inside. I put the cover back on with the Trav’ler and ConnecT wires going through separate channels, screwed it in place, and used, you guessed it, more Dicor.
Now for the more complicated part. If you are not certain about electricity DO NOT DO THIS YOURSELF.
The Winegard ConnecT 2.0 requires 1 amp of electricity. The DC powered lights in an RV are 1 amp as well. I simply used the T-taps to connect the power line from the ConnecT to the lights power source. I had to put on terminals and connect the ConnecT power line to the light power. Since our lights have switches on the light fixture itself, the lines are always hot. Your RV may be different, so consult your RV’s manufacturer or have someone knowledgable do it. In our case, the black wires were hot, which I found out through using a multimeter. I also spliced in the connector to the power switch, drilled a hole in the side of our electronics cabinet, connected the switch, made sure everything worked, and then put in the faceplate and pushed the switch in place.
I am not showing any photos of this because I will take no responsibility for you working with electricity. Again, if you are unsure, uncomfortable, or don’t know what you are doing, don’t do it yourself and find someone who can do this part for you.
Once you’ve got power to the ConnecT and the switch turned on, it’ll take about a minute for the system to boot up. With the SSID you got from the bottom of the unit, logon to the wifi network that matches. If you are in a busy campground, there may be others with a similar name so make sure you connect to yours and not try to connect to someone else’s. Open up a web browser and connect to http://10.11.12.1. It then brings up a page asking for a login and password. This is not the same as the login/pass to connect to the wifi, but only for the admin page of the ConnecT. The default is admin/admin, but you can and should immediately change this to something else. I also recommend bookmarking this page to keep it easy to access later.
There are many options here. At the bottom of the page after logging in is a dropdown menu with more options. Go into the pages, change the Wifi network name and password as well as the admin password so it becomes harder for anyone else to access your ConnecT. Then update the software if there is one available.
To connect to a wifi network at a campground, first scan for wifi, then select the campground wifi and enter the password. That should be all that is required and then set your devices to connect to the ConnecT wifi. The traffic will then go from your device to the ConnecT, to the campground router, and out to the internet. Each time you go to a new campground, all you have to do is login to the ConnecT’s admin page and connect to the new wifi. It will save the password for old networks you’ve used, so when you go back to a campground you’ve been to before, you just have to select the old wifi again and it should connect automatically, assuming they have not changed the password. The ConnecT will not connect to a wifi network that has less than 50% strength though.
I have not used the LTE service builtin to our ConnecT yet, so I cannot comment on its reliability or speed. It does come with a builtin SIM card, so you can use the Winegard service to get internet. Its kind of expensive for the amount of data it provides, but if you really need it, it is there as an option. It does allow you to add an AT&T or Verizon SIM card as well and use that instead, but you have to go through the process with those providers to get your own service and SIM card and install it. It looks like the SIM card goes in the side by the power cable, so you don’t have to remove the antenna from the roof to add a SIM card to it.
Results of using the ConnecT
Without the Winegard ConnecT 2.0, I can’t even see the campground wifi in our current location. With it, we have 51% strength. I don’t have a range finder to determine exact distance, but we are at least 100 yards away from the campground router. At other campgrounds we have been at, the distance has been comparable. We can see and use the wifi from much farther away than just using our computers.
I did notice that before the last software update, our connection was 51%. After I installed the update, it went up to 58%. Not a huge jump, but since nothing has changed other than the software, that’s still a decent boost. I checked with speedtest.net, and our speed drops slightly from being connected directly to the campground wifi and then through the ConnecT, but not very much.
I do wish the ConnecT had an ethernet cable though to connect to a router instead of having to use wifi just for security and a slightly faster connection. I’m not sure how much of a difference it would make, but I’d like to have as little wifi traffic in our RV as possible.
Summary of the Winegard ConnecT 2.0
The Winegard ConnecT 2.0 does exactly what it is meant to do, it makes it possible to connect to a wifi network from much farther away than with just a computer. It does not increase the speed of the wifi connection since the bottleneck is almost always the campground’s connection to the outside internet that is being slowed down, but at least it makes it able to connect from a greater distance.
The installation is really easy if you are comfortable climbing on your roof and doing some simple electric work. The admin web page is also easy to setup initially as well as update it to a new campground’s wifi when you change locations. 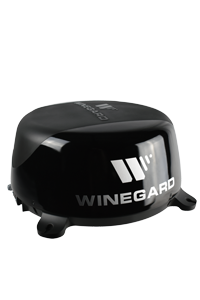
If you have your own hotspot, then I recommend just getting the wifi version and not the LTE version.
With the LTE model, you might be able to put the SIM card from your hotspot into the ConnecT, but that depends on your provider and contract with them. If you frequently hit your data limit on your hotspot though, the ConnecT can help you for the rest of the month to be able to get campground wifi without having to choose the closest site to the campground wifi.
[…] probably mount it on the side of the electronics cabinet near the Winegard power switch for the ConnecT 2.0. I assume it is the same color and there is plenty of room there, plus I might be able to tap into […]
[…] In one area, where I put the Winegard devices we had leaks from the mounts. Both are attached to the roof with screws, so I had put Dicor down, screwed them in, the more Dicor on top. We ended up having a leak in the roof though from both the Rayzer and ConnecT. […]