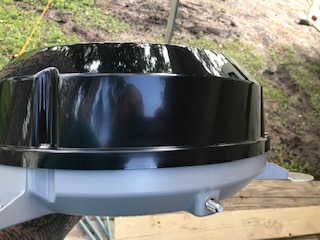
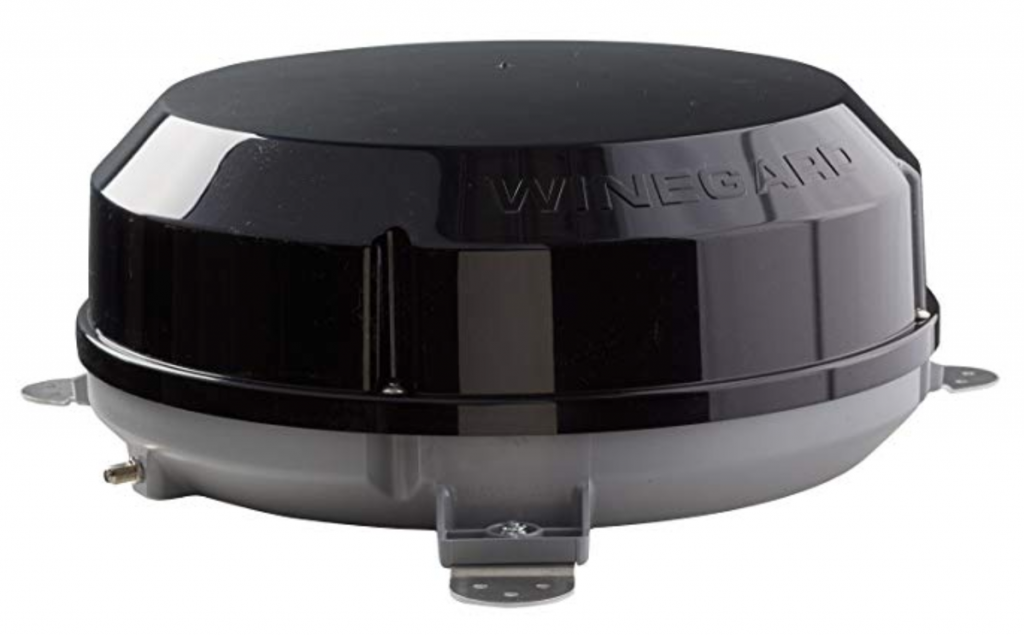
 I received a Winegard Rayzar Automatic RV TV Antenna from Winegard for installation and review in our Smart Home on Wheels. The installation was easy, setting it up to work on our TVs was simple, and so far it is working well. We will post an update in a few months to determine how well it lasts in the Florida winter heat.
Most RVs, depending on the age, come with what is commonly called a batwing-style antenna. It is on an arm that raises up and there is a hand crank inside the RV underneath the antenna that can be turned to get the best signal when moving locations. With old TVs it would have been easy to get a good signal since they always had some sort of picture and it would get clearer when the signal was stronger. With new flatscreen TVs and digital broadcasts though, this is more difficult.
On new TVs, pretty much any bought in the last decade or even longer, they do a search for channels and add them to the available channels. You cannot usually just select a channel, turn the antenna, and leave it in place where the picture is best. Instead, you would have to move the antenna, search for channels, see how many you can get and if not enough, turn it a little and do it all again. To say the least, that is very time consuming.
With the Winegard Rayzar Automatic, this process is made so much easier. The Rayzar Automatic has a small, quiet motor inside and sensors so it is able to spin the antenna around, find the area with the most and strongest signals, and point in that direction. Once installed, it is as simple as pushing a single button, waiting less than two minutes, and then going to the TV and doing a channel search. If you are frequently moving your RV to new areas, it is a nice addition that will simplify your entertainment setup and still give you free, over-the-air broadcast channels.
The Rayzar Automatic goes in the place where the old antenna was and comes with covers for both on the roof and inside the RV on the ceiling, and installation is pretty simple. Since our old antenna was damaged when we bought our RV used, I removed most of it a long time ago. I had left the base of the antenna, but removed the arm and cut the cable, as well as removed the crank inside.
Inside the box, you will find:
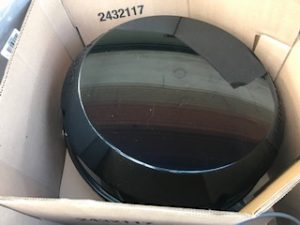
- The dome antenna assembly.
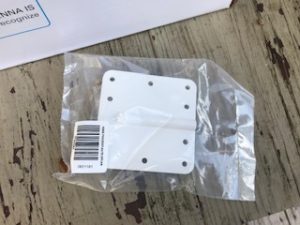
- Bag of parts and covers.
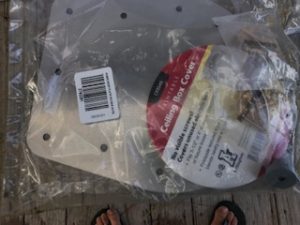
- Roof panel cover.
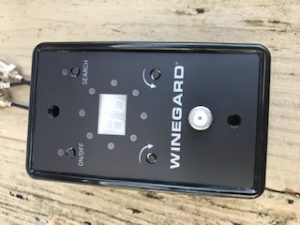
- Control panel.
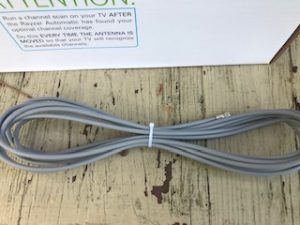
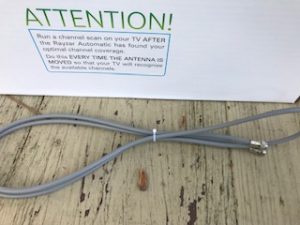
- Two coax cables.
 |
 |
 |
 |
 |
 |
If you have already installed a Winegard device on your roof, the cover will be the exact same part used for other Winegard devices. Since we have a Trav’ler and ConnecT 2.0, we already had a panel with 4 channels for cables and a hole drilled, so that part was taken care of. We did have to remove it though, as well as all the Dicor, and reattach it after running the new cable through.
Installation
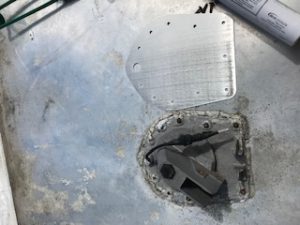 To install the Rayzar Automatic, the first step is to remove the old antenna. The Rayzar sits low to the roof, with about half an inch of clearance underneath, so it is impossible to install it on top of the old antenna mount. Instead, it has to be removed. Depending on the age of your RV, this can be a bit difficult. Since the new unit comes with a cover in the same size as the old antenna mount, taking the old one off and covering the now exposed hole shouldn’t be a problem. Just remove all the screws, cut the coax cable, and remove all the caulking from the old unit. Since our roof is aluminum, I was able to just use a putty knife and some cleaner to get it nice and shiny again. If you have a rubber roof, check with your manufacturer to figure out how to best remove the excess caulk.
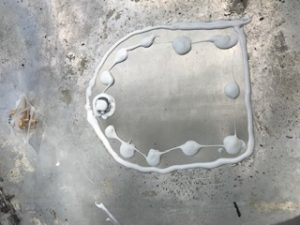 As anyone who has read my previous reviews knows, I love Dicor Self-Leveling Lap Sealant. I have never had it leak when properly applied, it sticks well to the aluminum roof, and it is easy to apply. I use it all over the roof to fill in small crevices and prevent or stop leaks from the roof. After I screwed the new cover in place, I put Dicor on all the screw heads and around the edge to make sure we never get any water in here.
The cover does have one larger hole and comes with a gray, rubber stopped that fits in the hole. It is located where the old cox cable was, but honestly, I’m not sure why it is there. The cable for the Rayzar does not go through there, so it seems odd to have a single, larger hole that just gets filled in and covered anyway.
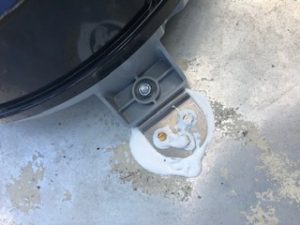 After letting the Dicor dry, I then placed the antenna over the cover plate and marked where the feet would be sitting on the roof. The Rayzar is meant to point forward and be in line with the RV, but since the antenna inside the dome rotates, I assume this is simply for aerodynamics. One foot points forward and the cable connector points to the back. With the feet locations marked, lay down some more Dicor where they will go, set the dome back in place and make sure it is lined up correctly. Then just screw down the feet and add more Dicor on top of the screw heads and around the feet.
Next run the longer of the two coax cables into the RV through under the small, white, plastic cover. As I said before, we already have two other Winegard devices, so I had to take off the old one, scrape all the Dicor off, make the hole slightly larger to fit the coax terminal, and then cover everything back up and seal it again. Since all our cables go into our electronics cabinet that is up above our living room TV, this was a perfect location for the control panel as well. Our electronics cabinet is next to our main door with the side of the cabinet next to the stairway, so there was room to mount the panel there as well. Additionally, there is access to DC power easily, so it was an ideal location.
Since there are two coax cables in the box, make sure you use the longer one to connect the dome to the panel. One is twenty feet, the shorter is six feet. Some coax is pretty stiff and hard to work with, but the ones provided are pretty easy to bend and move around. If for some reason you need a longer cable, it is possible to use a longer one than provided, but the hard limit for connecting the dome to the control panel is 35 feet. Any longer than that and it either won’t get enough power or there is too much signal loss to be effective.
With everything done on the roof, it is time to go inside the RV and finish the job.
The Control Panel
The control panel is a small black rectangular box that is mounted to a wall with three cables coming out of the back and a two tabs for connecting to power. The power tabs are labeled for hot and ground and the three coax ends are labeled as well on the back of the board. The coax terminals are Antenna In, Cable In, TV Out. My only issue with this is that the label is on the board and not the on the cables, so once it is installed and the cables are run through a wall, there is no way to tell which cable is for which connection. This means you have to connect the cables first and hopefully never remove all three in the future at the same time since it would require removing the panel from the wall and figuring out which terminal goes to which connection by reading the text on the board again. Once it is installed, that doesn’t matter, but if anything needs to be changed in the future, it is a small inconvenience. When you are installing yours, I recommend putting a small tab or even different colored zip ties around the cables to know which is which for the future.
Power
The Rayzar control panel and dome get power from a DC power source in your RV. I’m not going to go in detail how to do this as electricity is never something you should mess with if you do not know what you are doing. I connected ours to a DC light power line, you will have to figure out how to do your own or find someone who can do it for you. If you are uncomfortable, unknowledgeable, or have no idea how to work with electricity, do not do this yourself.
Once the panel is powered, the press the On/Off button and it will light up.
Connecting to the TV
To connect the control panel to the TV, simply connect the coax cable to the TV Out cable on the panel and the other end to the TV In connection on your TV. If you’ve ever set up cable TV in a house, it’s the same. That is really all there is to it. The Rayzar can support multiple TVs as well, so in our RV, we connected a two-way splitter to the TV Out, then ran one cable to the living room TV and a second cable to the bedroom TV. You will need a short cable to connect a splitter to the control panel though as both have male connections and cannot connect directly to each other.
Finding Channels
With power to the control panel and antenna, press the search button and wait a couple of minutes. There is a circle of LEDs in the middle of the panel and they will light up in sequence as the antenna turns inside the dome up on the roof. I have no idea how loud it is, but I heard nothing at all as this was happening and I was about 8 feet from the spot underneath the antenna, albeit inside the RV.
When it is finished, the light pointing in the direction of the best and strongest signals will light up, indicating which direction the antenna is now pointing. Then go to your TV, make sure to set it to correct input and be certain it is set to Antenna and not Cable, and do a channel search. It can take awhile depending on your location and proximity to the nearest towers.
In our current location, we are about 30 miles from Orlando, Florida and it was able to find 74 channels. Some of them are in Spanish (and we don’t speak Spanish), some of them are duplicates, but we still have about 50 useable channels for our circumstances. We are going to be here for awhile, so I won’t be changing the antenna until we do move, but in order to get new channels at a new location, just turn on the control panel, do a search, then do a channel search on the TVs and that’s all there is to it.
The last step is to remove the old crank inside the RV and use the included cover. It is a small off-white and nearly flat dome that covers the hole completely. It can be painted, so in the future if we do some more remodeling and paint the interior, it will be almost invisible on the ceiling.
Some Caveats
There are a couple of things to mention about the installation and use of the the antenna.
First is that small rubber stopper for the plate that covers the old antenna mount. I have no idea why there is a hole with seemingly no purpose, only to be filled with a plug. Maybe it is to run the cable for the new antenna, but then there would be sharp edges rubbing against the coax cable.
Second, there is a very small bag of parts for the control panel. It has two screws with the heads painted black for mounting the panel to the wall as well as two terminals for connecting power to the board. I promptly lost this and have still not been able to figure out where I put it. I had some power terminals on hand (they are the blade-style, commonly used), but the screws are MIA. That means for us at the moment, the control panel is just dangling off the side of the cabinet. It isn’t a big deal since it is out of the way, but I wish I knew where that small bag of parts ended up so I could finish the job. This is not a fault of Winegard though, I simply misplaced the bag so remember where you placed it when doing your installation.
Third, and I’m not sure if this is the TV, the antenna, or the broadcast signal, but we do occasionally lose the signal for a moment. It does not happen on every channel and in fact only happened on one channel that I have noticed, but when watching a live football game, once every five minutes or so, our TV would say Signal Lost, go black for less than a second, then get the signal back and go back to normal. I have a feeling it was due to weather or just that channel because it doesn’t happen on any other channel that I have noticed. It wasn’t as if it went out for a long time, it was just a momentary flash when it lost the signal and it always came back, but it was still noteworthy.
Finally, and this is not a bad thing actually, but we do get a lot of channels in HD. I’m not sure how many, but for someone growing up with old tube TVs, having broadcast HD TV, even if it is 720p and not 1080p, is pretty nice. The picture is clear, the sound is great and there is no more static on over-the-air TV since the switch to digital a few years ago. We do have to get used to commercials once again though since we became accustomed to watching TV on Netflix or just YouTube and rarely watched live TV in the past year or more. I had forgotten how annoying commercials are.
Conclusion
In our situation, the Winegard Rayzar Automatic RV TV Antenna works great. It was able to find a lot of channels, it was easy to set up, and it has been working without issue for a few weeks now. We have not moved locations since I installed it though, so when we do next move locations, it should still be easy to recalibrate everything to the new channels.
After reading a lot of other reviews, I have seen mention of an E3 error that might have something to do with power or a motor failure, so we will have to see if that happens to our unit. Some reviews say it has been corrected in newer models, but it is still something to be aware of. Winegard support has been great to deal with whenever I’ve emailed them though, so hopefully they can walk you through and help you with any issues you might have.
If you are a traveler and want free HD TV channels, I recommend the Winegard Rayzar Automatic. It is more expensive than traditional manual crank antennas, but it is so easy to find local channels while just pressing a button that the elimination of searching is worth it. Once it is installed, it is easy to use as well and you won’t have to do anything to it until you move to a new location. Even after getting to a new location, finding new channels is just a few button presses and takes more time waiting for the antenna to find the strongest signals and the TV to find the channels than you actually having to do anything. Press a button, walk away and do something else, and come back to it in few minutes and it is done. Can’t beat that.
[…] has performed as expected though and we have had no issues with it not working. I had commented previously about the channels sometimes going out and after setting up TVs in other people’s RVs with the […]
[…] screwed them in, the more Dicor on top. We ended up having a leak in the roof though from both the Rayzer and […]