
Its been a few months since I used some of the Henry sealant products. There has been mostly good, one somewhat bad, and more to come.
Henry Stop Leak Spray on Silicone
First off, I learned that the clear spray-n silicone is not very durable. I had put some on one edge to try it out, and when I went to clean it to use the Tropi-cool, the silicone rubbed right off. So if you are using it on an area that has any kind of friction, it will come off. It is not really meant for that though, so that’s my fault.
I did spray it in two areas on window seals though, and in those areas it has been perfectly fine. It is barely noticeable, and probably only because I know it is there. It does have a slight sheen to it, but it is hard to see unless the light hits it right.
Because it is clear, you can put it on areas of glass or window seals, and it will fill in the cracks and settle, protecting and sealing the old seal without removing anything.
I used it on the window above the cab as well as the small window by the foot of the passenger seat (which Tiffany calls that the “cat window”). In both areas, there are no longer any leaks.
Henry Tropi-Cool 100% Silicone Seam and Repair Roof Sealant
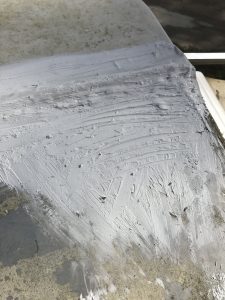
The seam and repair roof sealant has worked perfectly. I ran it along the edge where there is a border between fiberglass and aluminum, and it stuck to both totally and doesn’t appear to be coming up at all.
I had some areas where Dicor was used, but ended up with leaks for some reason. I’m not sure if it is a fault of the Dicor or my application though.
In one area, where I put the Winegard devices we had leaks from the mounts. Both are attached to the roof with screws, so I had put Dicor down, screwed them in, the more Dicor on top. We ended up having a leak in the roof though from both the Rayzer and ConnecT.
To fix that, I removed each of them, cleaned the roof and the mounts, and covered both with the Henry Tropi-Cool. I gobbed it on, around, all over the place.
Then I had a leak in another area where I had mounted our TV to the roof. Its a relatively complex system, but I had drilled holes in the roof and put a metal plate on top to hold the mount. The bolts holding the pole that the TV is hanging from had a small crack that allowed water in. I covered the whole edges of the plate, the bolt heads, anywhere water might get in, with the Tropi-Cool.
Again, no leaks anymore.
For the next steps in the process, I’m going to be cleaning and covering the roof rack mounts so they do not allow water in. I also want seal the edges of the vents up there and will have to replace some of the vents as well. Probably not the large vents that open, but at least the small plumbing vents as they are a bit cracked and damaged and need to be fixed. Those are easy though.
For the vents, I can just replace the top covers and leave the inside mount itself. The hardware is fine, I just need better covers as at least two of them have damage. I would like to replace the bathroom vent with one with a fan that actually works though and maybe add a Fan-Tastic Vent RV Roof Vent. That would help in times when we need to move air out, but not need the air conditioning running all the time.
Henry Tropi-Cool Roof Coat
Tomorrow, I’m going to have to figure out a way to get a heavy, five gallon bucket up to the roof. It weighs 55 pounds, so it’ll take some effort and creative thinking. Once I do get it up to the roof, I’m going to clean the roof in one area, let it dry, and then apply some of the coating to see how it works.
I do not plan to do the whole roof right away. I want to do part of the back area above the bedroom. That way, I can test the ceiling inside with a thermometer and see if it makes a difference under the hot Florida sun.
If it works as advertised, then I’ll cover the whole roof a day later. It’ll require figuring out a way to work around the air conditioner though. Since it has been in the 90s lately, I need to be able to put it down when there is not condensation from the A/C.
I will also have to see how well it adheres to itself. If it does stick well and makes a seamless bond, then I can just put it on an area at a time and not do the whole roof at once. I can cover areas as needed, then go over it once again when it is all done to use the whole bucket to cover it nice and thick. It should make it both waterproof and insulated, as well as nice and white so sunlight will bounce off and stay cooler inside. That, in turn, will reduce our need to use A/C as much and lower our electric bill.
The Awning
We also have some areas where the awning leaks at the point that it connects to the sidewall. I’m going to use the Henry Tropi-Cool 100% Silicone Seam and Repair Roof Sealant along the whole joint area and hope it can seal it and stop dripping there.
Finally, the air conditioner
The last part up on the roof is figuring out how to make the air conditioner drain the direction I want it to. We will probably move the RV soon within our site a little, so it will be adjusted and level. I want to put it up on 2x12s so the tires are off the ground. That will cause it to change level a little which may cause the A/C condensation to follow a different path. I won’t know until we move it though.
I do also plan to add a condensation gutter though so it doesn’t drip down the side of the RV, but instead off the edge and to the ground. I may need to add a barrier to force it to go the way I want it to go though.
It is a good thing we have a long weekend coming up so I can work on these things.